Ingredients
Units
Scale
- 8 oz. garlic and herb goat cheese (two 4 oz. logs)
- 1/4 cup all-purpose flour
- 1 egg, beaten
- 1/2 cup finely chopped pecans
- 1/4 cup panko breadcrumbs
- vegetable oil for frying
- Kosher salt
- fresh cracked pepper
Serve with:
- fresh chopped parsley
- honey
- red pepper flakes
Instructions
- Cut each 4 oz. log of goat cheese into 6 slices so you have 12 slices total. Cut each slice in half and then form each half into a round ball so you have 24 balls total.
- Add flour to a shallow dish. Add beaten egg to a shallow dish. Add panko breadcrumbs and pecans to a shallow dish along with a couple pinches of salt and pepper, and stir to combine.
- Working in batches, dredge goat cheese balls in flour, then transfer to the egg mixture, then transfer to the breading mixture.
- Place on a large platter and freeze for 15 minutes.
- Heat about 1.5 inches of vegetable oil in a large pot or Dutch oven over medium heat. I use this Dutch oven and add about 4 cups or so of vegetable oil. This allows the goat cheese balls to be completely submerged as they are frying.
- Test oil to see if it’s ready, then fry goat cheese balls in batches of about 6-8 depending on the size of your pot. Cook them for about 30-45 seconds total or until the outside is golden brown and crispy. If they are cooking faster than that, your oil is too hot. If they’re taking longer to cook, then your oil is too cool.
- Use a slotted spoon to transfer goat cheese balls to a paper towel-lined platter to soak up the excess grease. Sprinkle with Kosher salt.
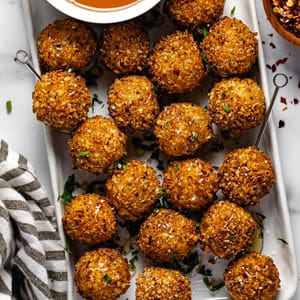
- Transfer to a serving platter and drizzle with honey. Garnish with fresh chopped parsley and red pepper flakes if desired. Serve warm.
Notes
- Whenever you’re breading something, be sure to have a dry hand and a wet hand. For example, use your left hand to put the goat cheese into the flour and roll it around, then drop it into the egg wash. Then use your right hand to roll the goat cheese balls around in the egg wash and then drop them into the breading. Then use your left hand to coat the balls in the breading mixture. This will ensure that you aren’t breading your fingers as you bread your balls!
- I like to use garlic and herb flavored goat cheese but feel free to use your favorite flavor or mix in your own flavor enhancers. Tomato basil, jalapeno honey, blueberry lemon, fig and olive, or cranberry cinnamon are just a few of the flavored options you might find at your grocery store!
- Make sure you don’t skip the freezer step. This helps ensure everything stays together and doesn’t immediately melt or fall apart when added to the oil.
- To test if the oil is hot, stick the handle of a wooden spoon in the center of the pot. If small bubbles quickly form around the handle and float up, the oil is ready! If not, give it a couple more minutes until this happens.
- Adjust the stove temp as needed based on how your balls are cooking. All pots and stoves are going to cook differently which is why I highly recommend this heavy bottom Dutch oven. It holds the heat well and also ensures that the oil is heated evenly.
- If you’re goat cheese balls are getting dark brown in less than 30-45 seconds, then your oil is too hot. If they’re taking longer than 60 seconds to cook, then your oil is too cool. The key is to get the outside crispy and delicious while gently warming the goat cheese inside. If you cook them too quickly, the outside will be done, but the inside won’t be creamy. If you take too long to cook them, the goat cheese will become to melty and start to break through the crust and come out. Try testing a couple of balls to see how they cook before you start working your way through the batches.
- Prep Time: 20 minutes
- Cook Time: 10 minutes
- Category: Appetizer
- Method: Stove Top
- Cuisine: American
- Diet: Vegetarian
Nutrition
- Serving Size: 1 ball
- Calories: 68
- Sugar: 0.3 g
- Sodium: 12.8 mg
- Fat: 5 g
- Carbohydrates: 5.3 g
- Fiber: 0.5 g
- Protein: 1.4 g
- Cholesterol: 7.8 mg


