Pizza Dough Cinnamon Rolls
Refrigerated pizza dough makes these cinnamon rolls easy to prepare in just 15 minutes! Let the sweet smell of homemade cinnamon rolls fill your kitchen this weekend.
Instructions
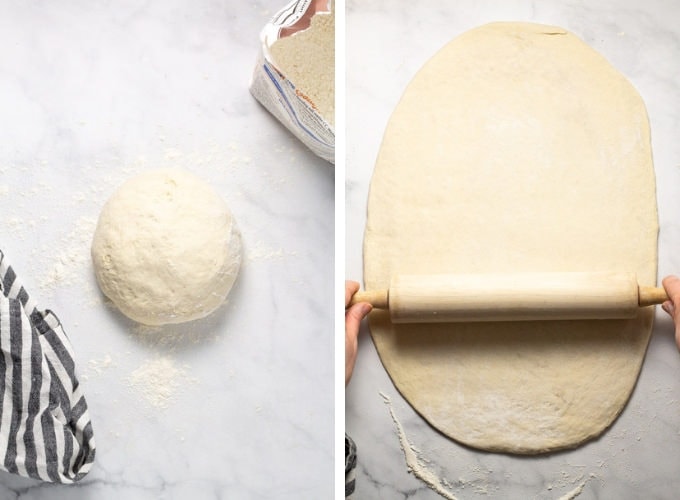
It’s simple – you’ll start with my no knead pizza dough recipe! And it could not be easier to make. Stir together yeast, flour, oil, salt and water and let it rise overnight.
If you’re short on time, feel free to use one lb. of store bought pizza dough in place of my no knead pizza dough recipe.
Turn dough out onto a lightly floured surface. Use a rolling pin to gently roll dough into a large rectangle.
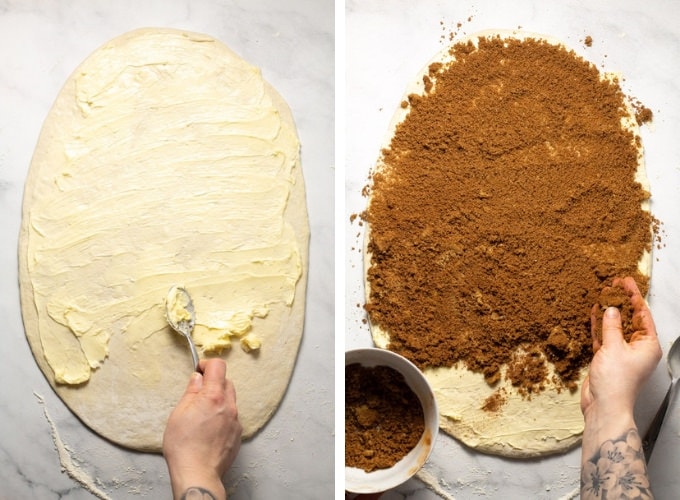
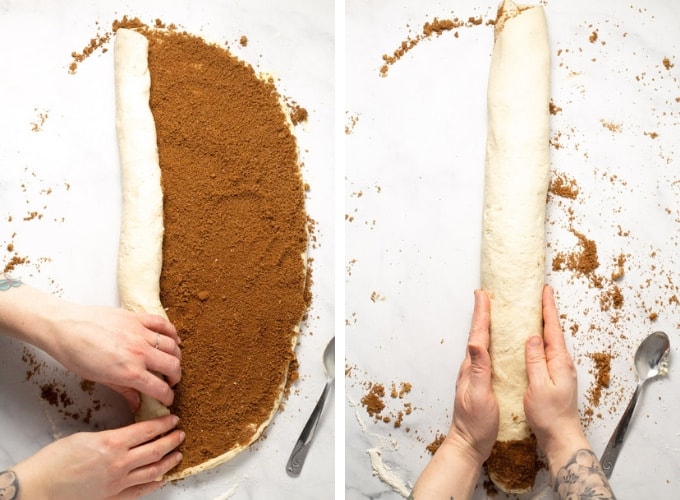
Spread a thick layer of softened butter across the dough and sprinkle on a bunch of brown sugar and cinnamon.
Roll it tightly into a large log.
Gently push the ends of the log inwards, so that it’s the same thickness throughout. Use a knife to score the log into three equal parts.
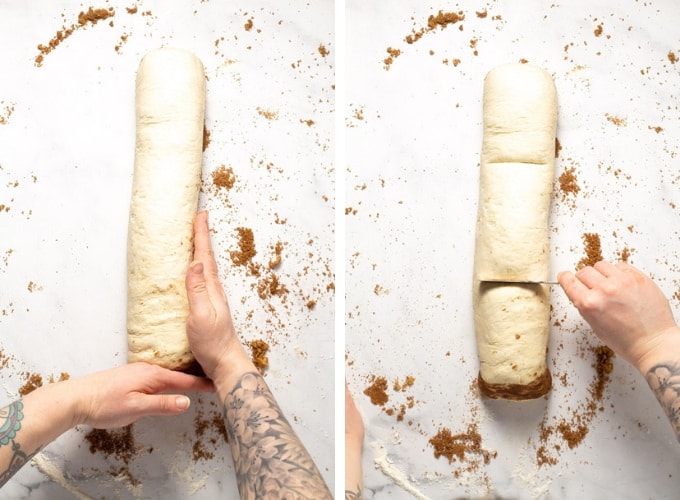
Use a knife to score each of those sections into 3 equal sections. Use floss to cut along the scored lines, creating 9 rolls.
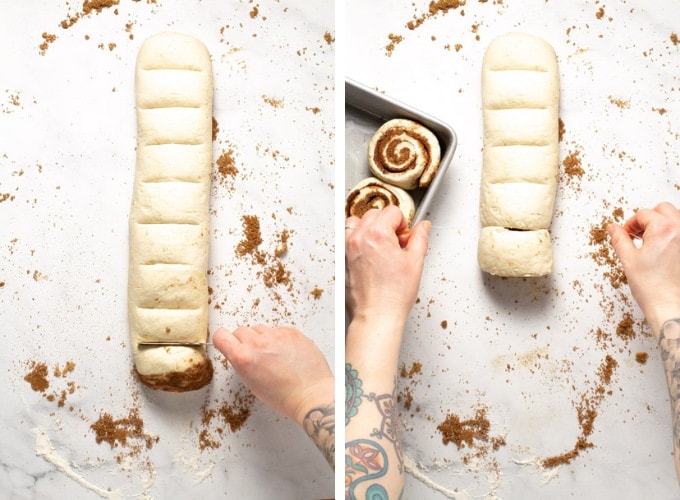
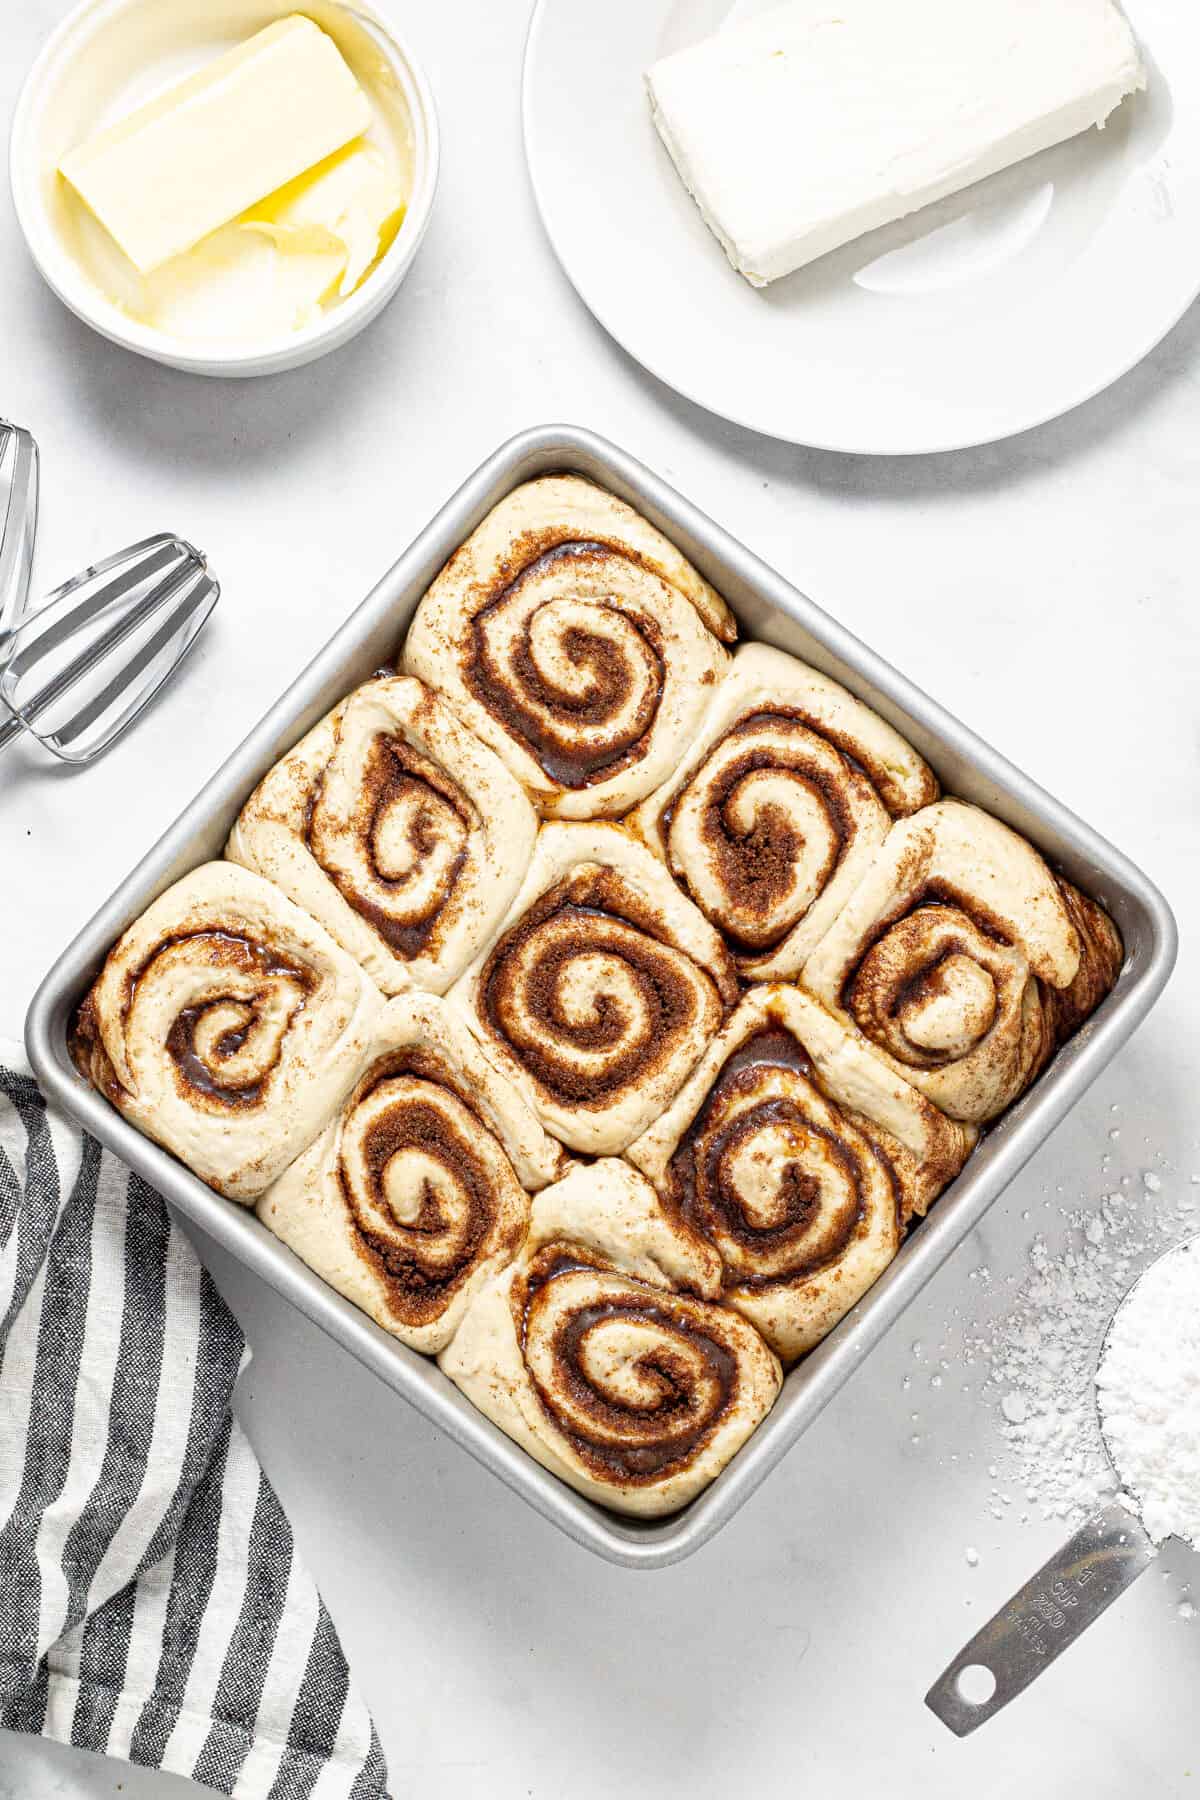
Gently form them into round cinnamon rolls.
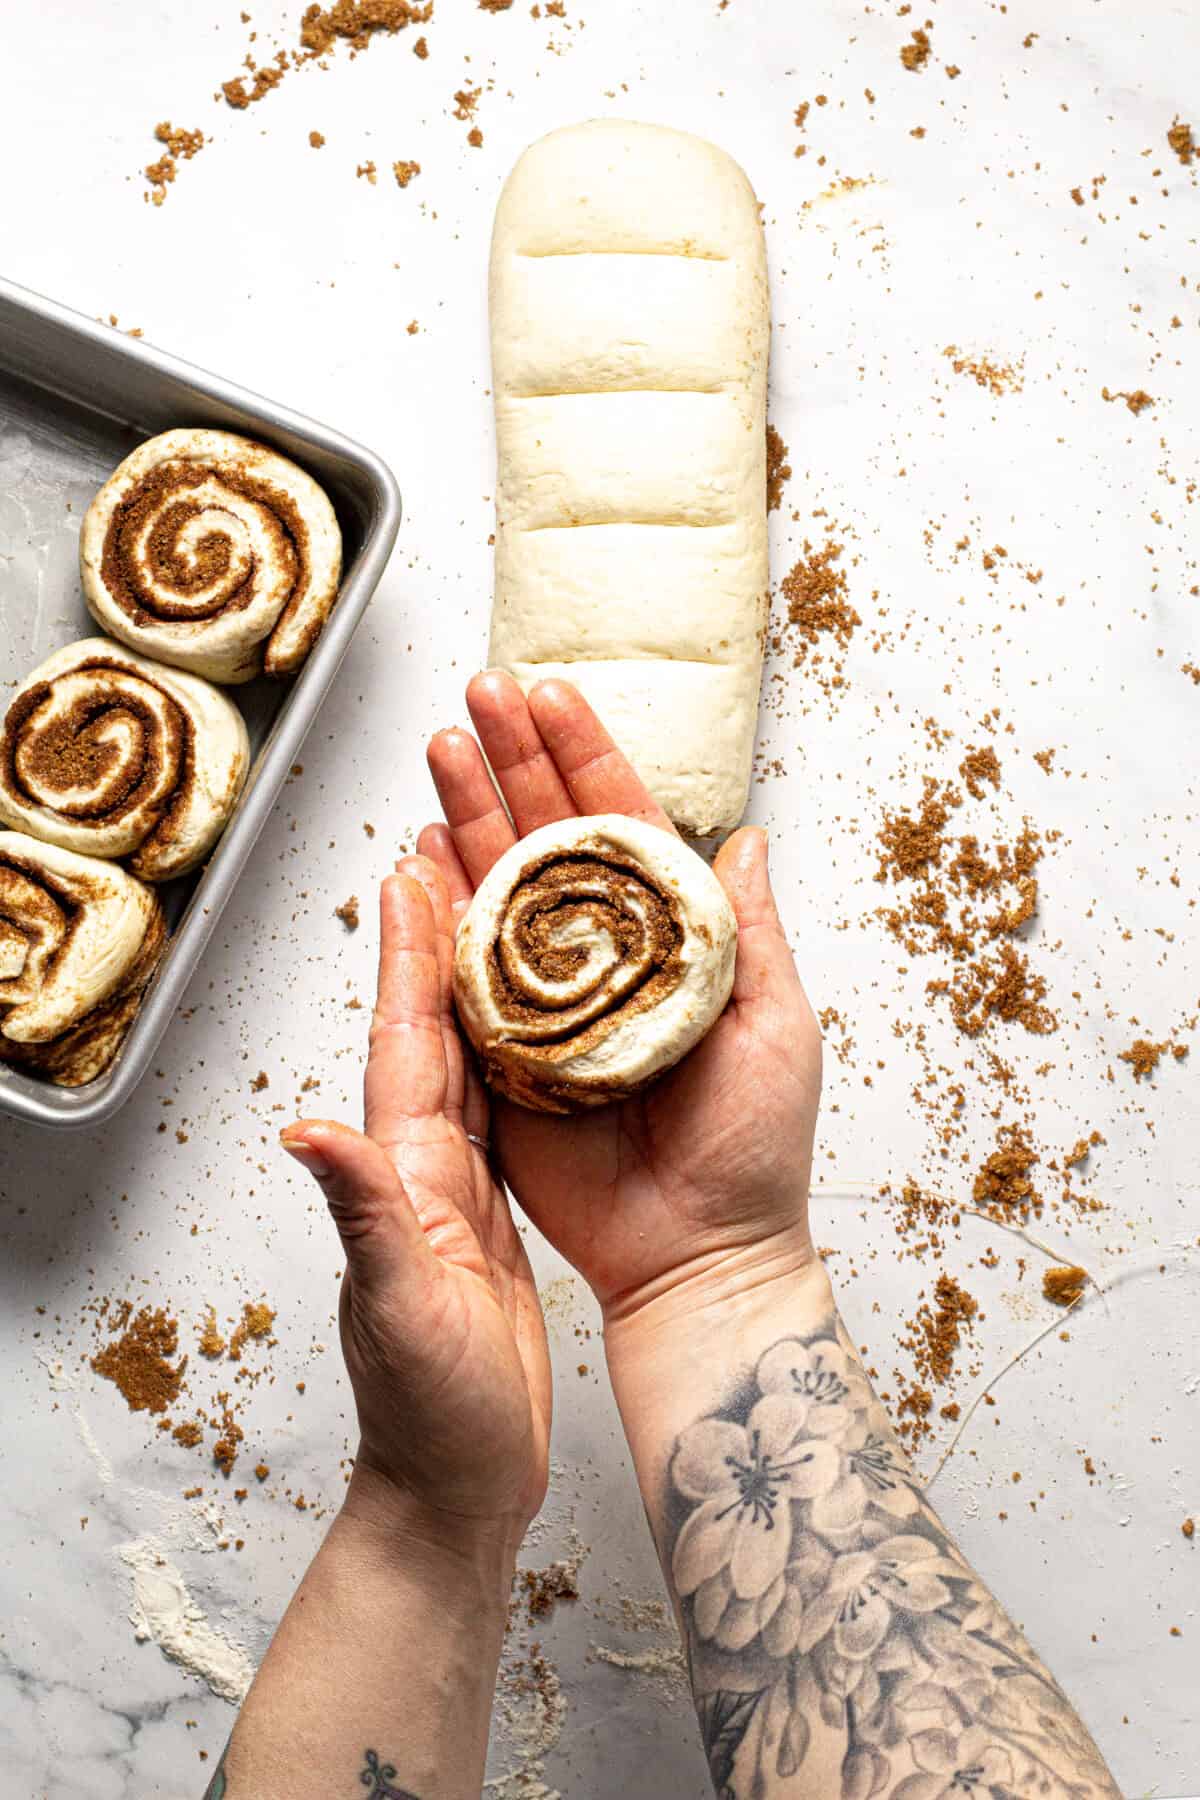
Place rolls into a greased 8×8 baking dish and let rise for 30 minutes.
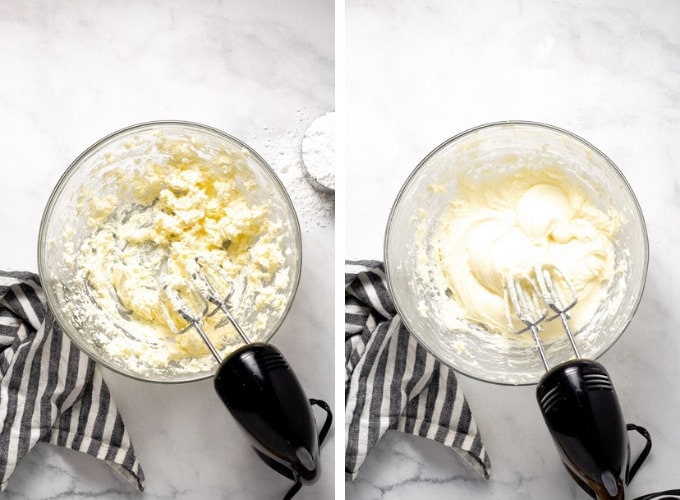
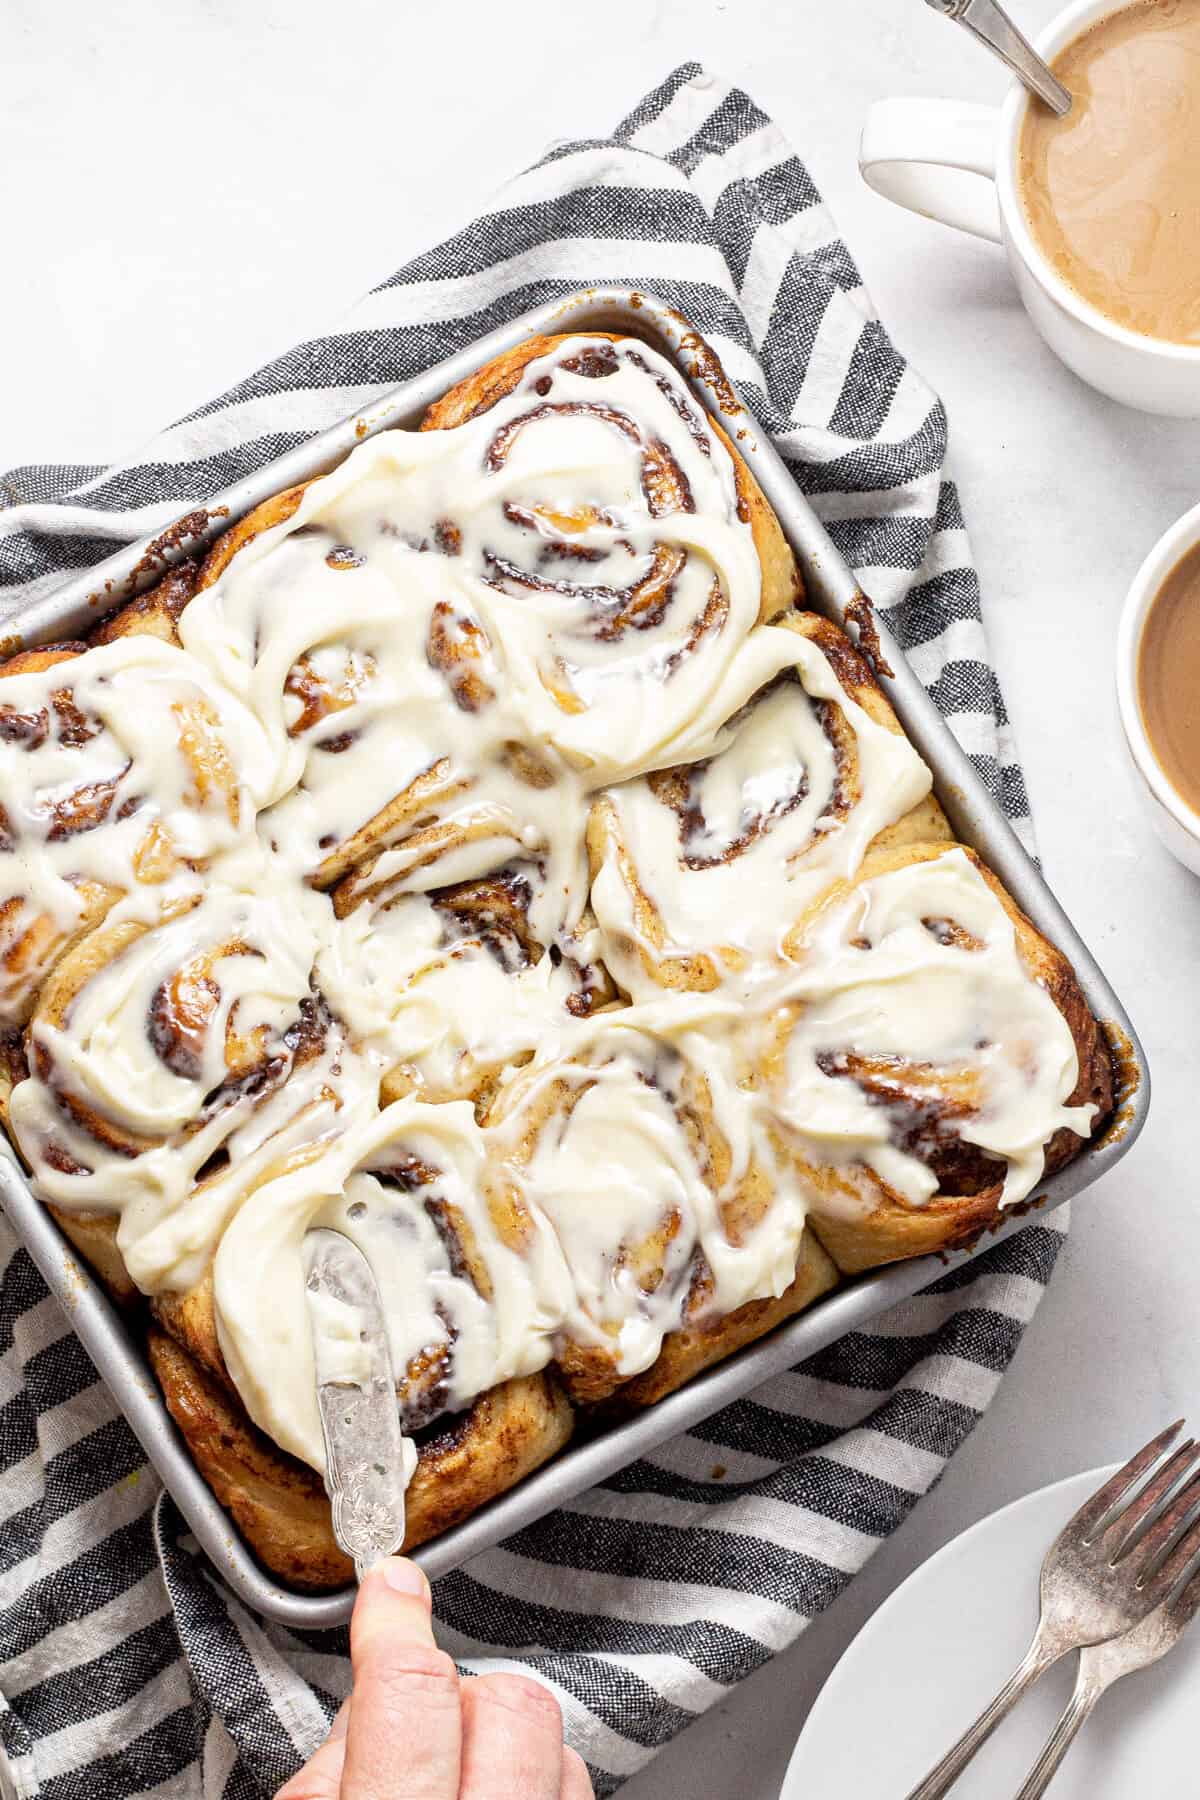
Bake for 30 minutes. While the rolls are baking, get that frosting made! You’ll beat butter and cream cheese with a hand held mixer, then add powdered sugar and just a pinch of salt.
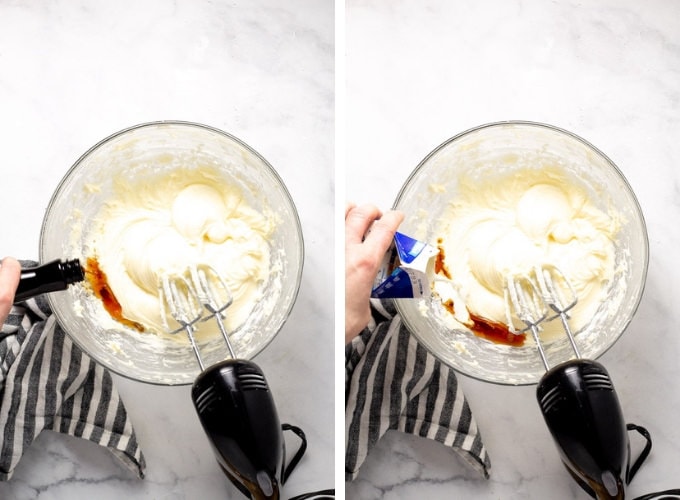
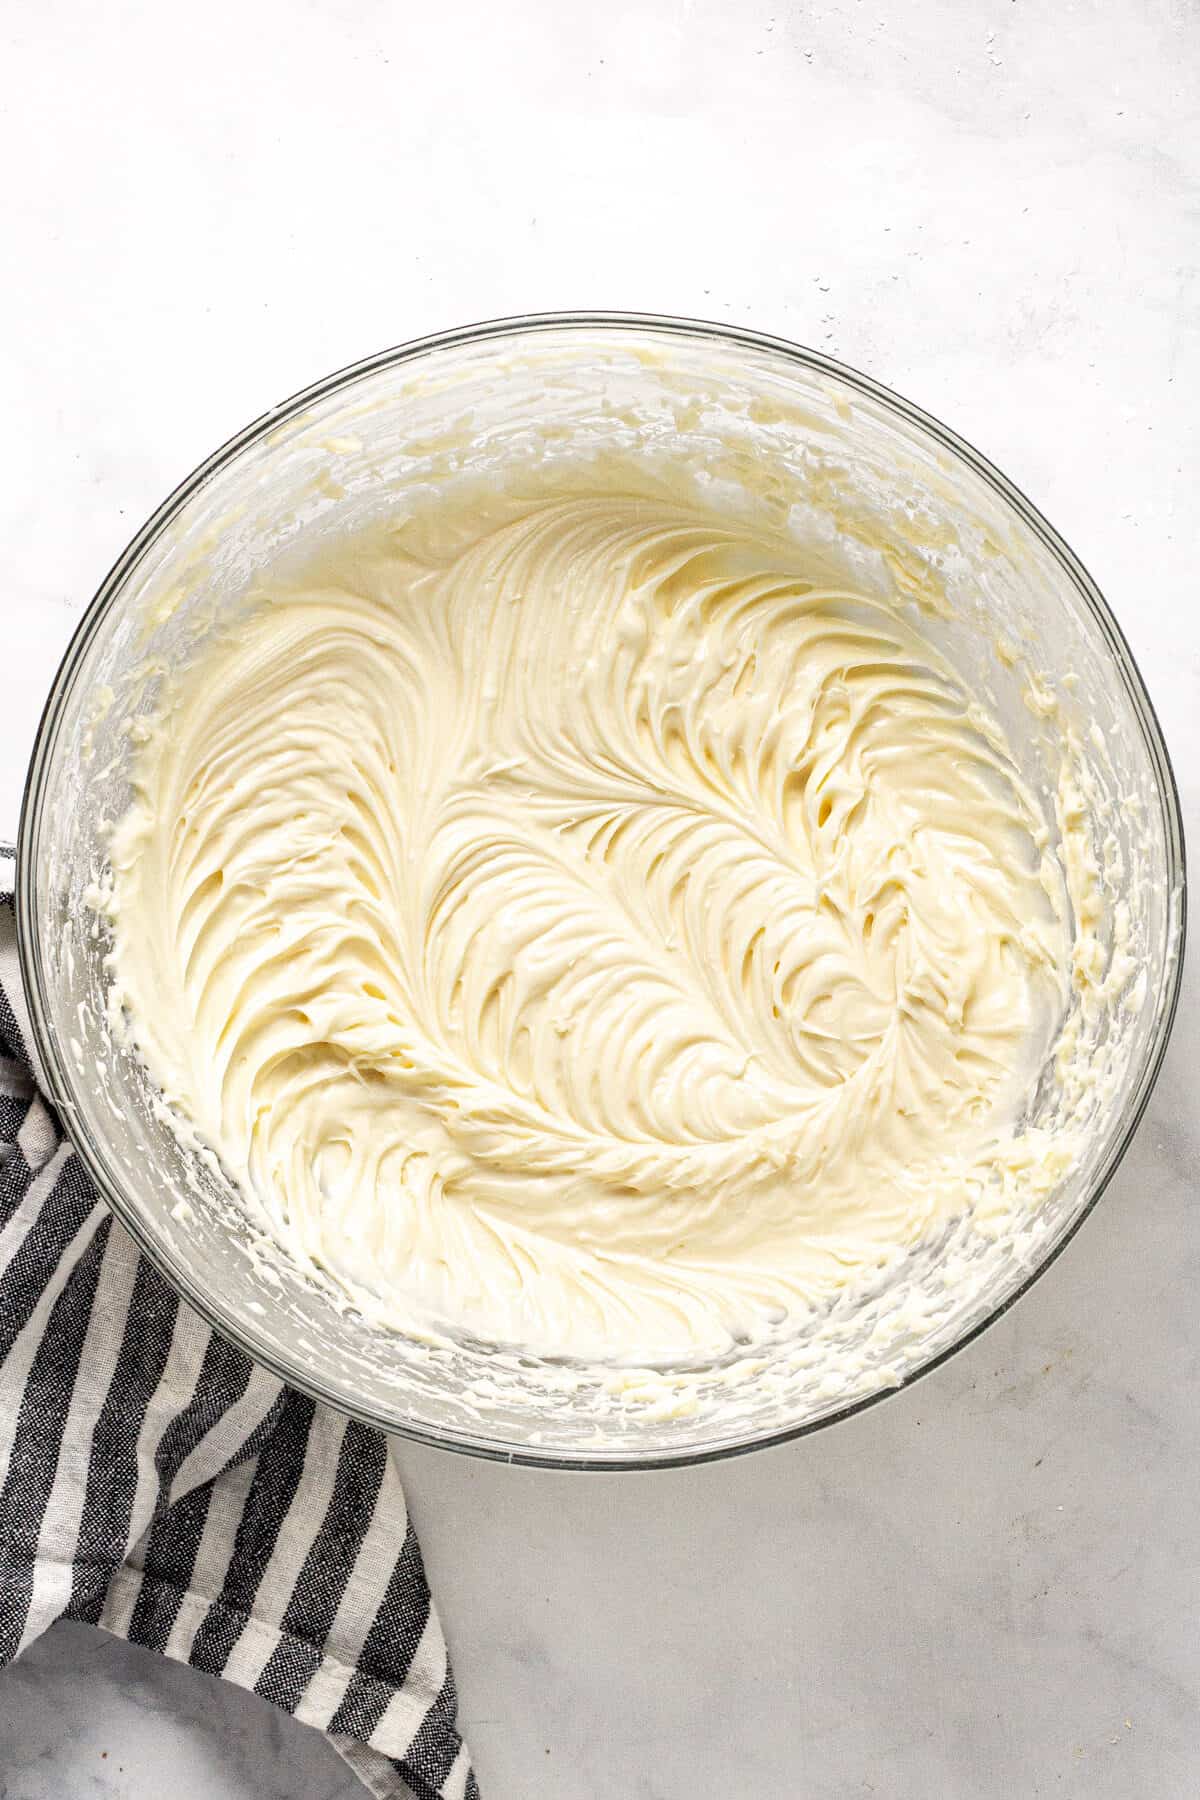
Loosen it up with a bit of vanilla and heavy cream until you reach the your desired consistency. I’m a thick and creamy gal myself.
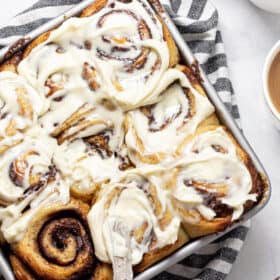
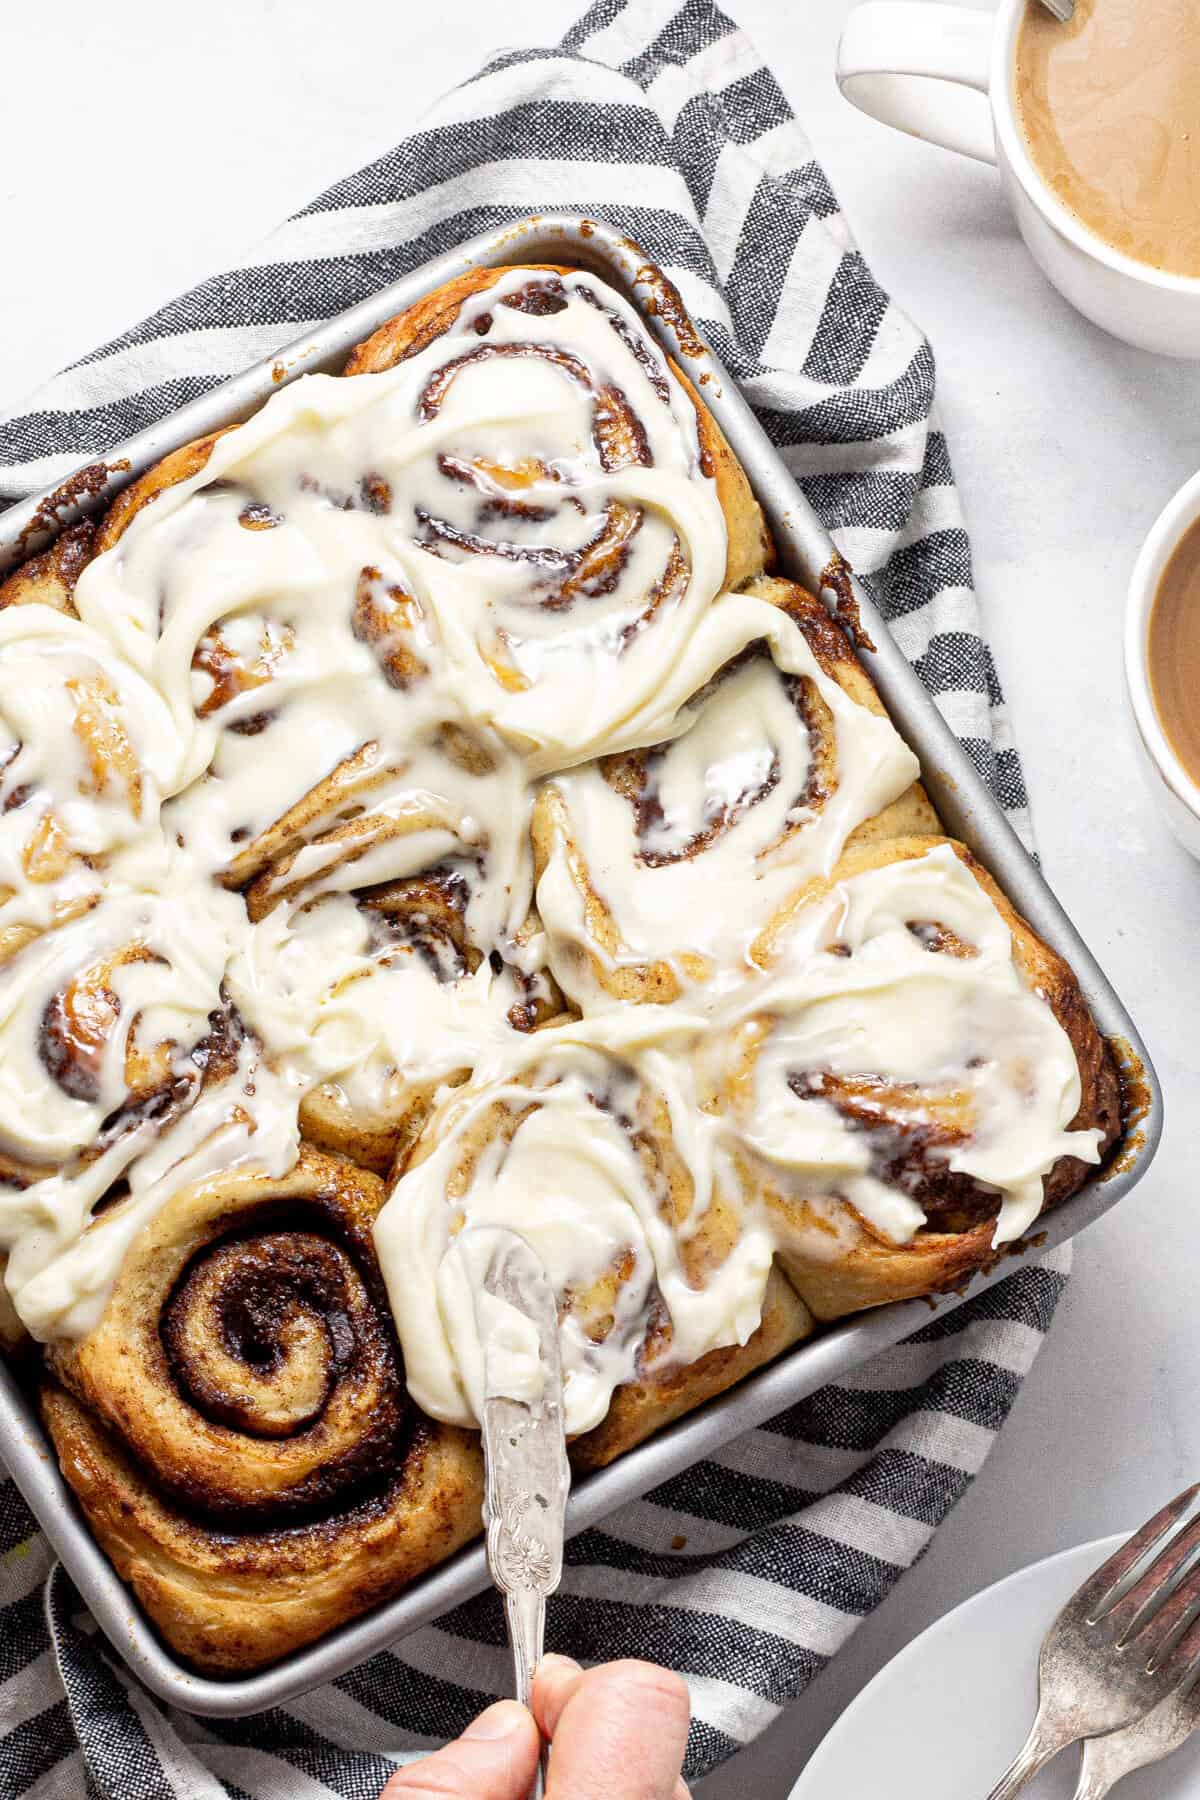
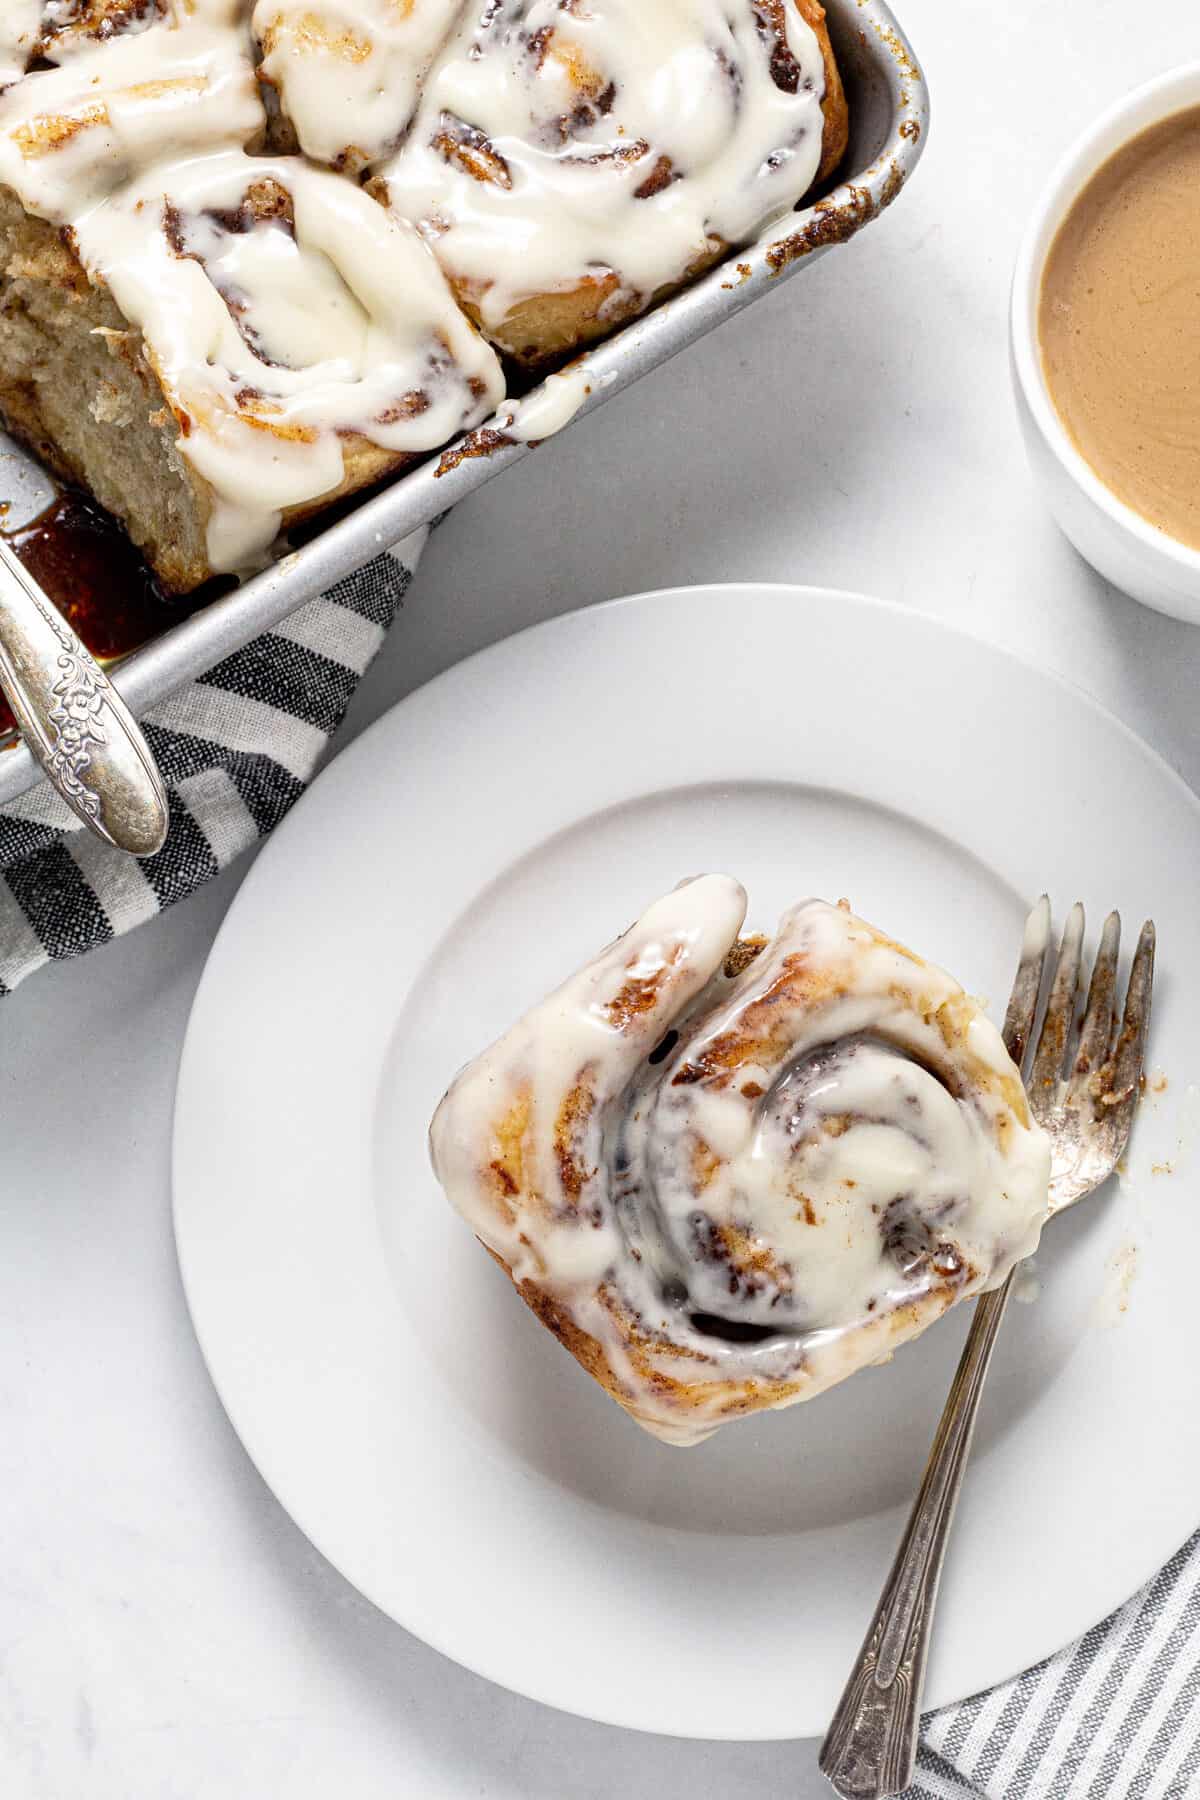
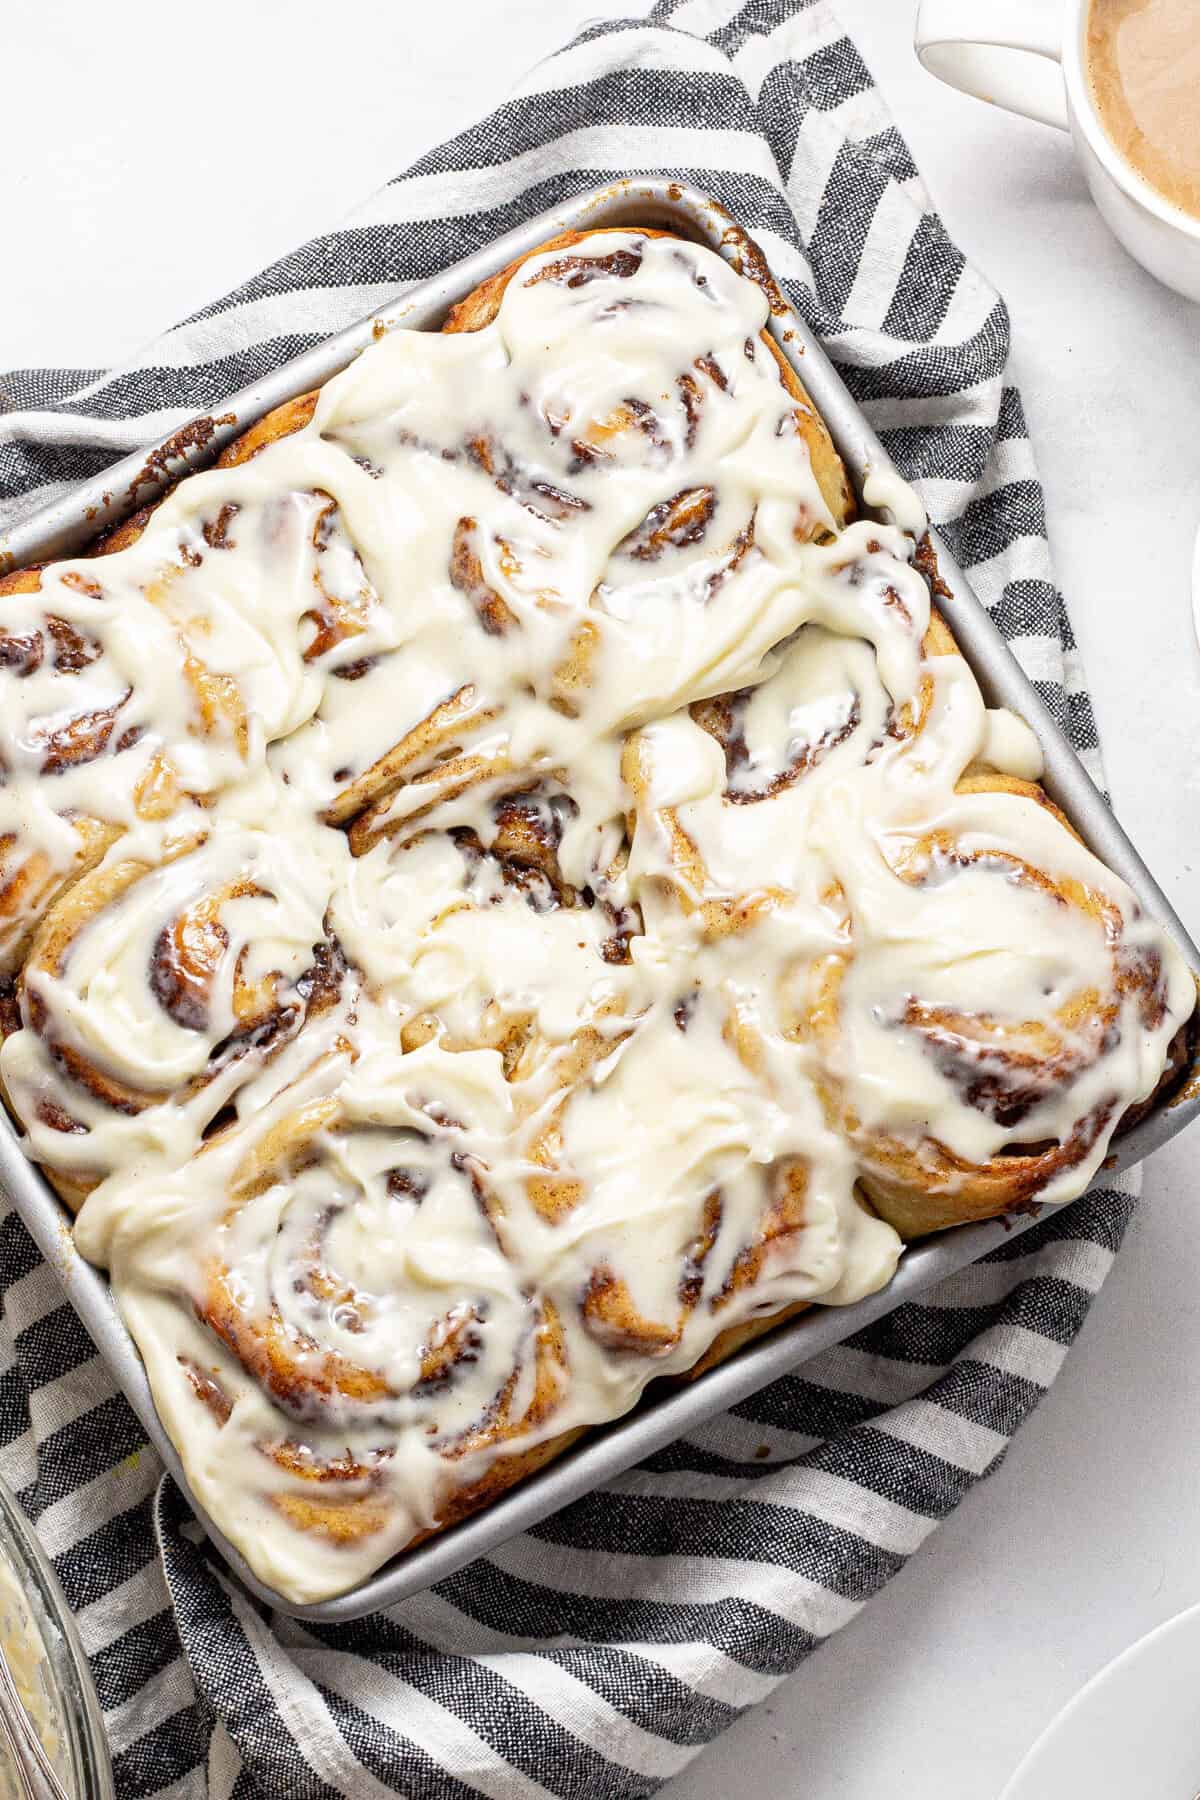
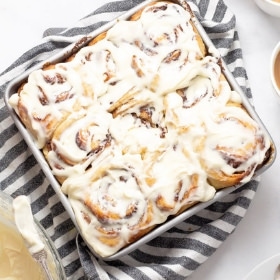
Generously frost freshly baked cinnamon rolls and serve warm!
Cutting Cinnamon Rolls
- The easiest way to cut cinnamon rolls is using floss.
- Just shimmy the floss underneath the log, using your scored lines as a guide. Cross the ends of the floss over each other in a straight line and pull in opposite directions. This will give you a perfect, clean cut.
- Even the sharpest of knives will typically smash the dough and cause the filling to spill out everywhere. Unflavored floss is preferable, but I’ve used mint flavor and you can’t taste it at all.
Frosting
- The frosting for these cinnamon rolls is made by mixing mainly cream cheese, a little bit of butter a whole lot of powdered sugar. A splash of vanilla and a couple tablespoons of cream loosen it up perfectly and give you a rich, velvety, decadent cream cheese frosting.
- The warmth from the cinnamon rolls will melt the frosting and make it perfectly oeey gooey. If you’re into a lot of frosting, feel free to double the frosting portion of the recipe as well.
You’ll Love These
- They take just 15 minutes to prepare! My no-knead pizza dough or store-bought refrigerated pizza dough is going to make these cinnamon rolls a breeze to throw together on a Saturday morning while the kids are still asleep!
- They taste just like your favorite bakery’s cinnamon rolls – but you can enjoy them while sipping your morning coffee and sitting in your jammies.
Hand Mixer
- For the dough, you don’t need a mixer.
- For the cream cheese frosting, you will need at least a hand held mixer.
- I haven’t met a rich, creamy frosting that didn’t require a mixer in fact! I lost a pin to my handy dandy stand mixer so I just use a cheapo hand mixer to make all my frosting now and it works great. With the butter and cream cheese at room temperature, this frosting comes together in just minutes!
Tips
- Pizza dough makes the perfect cinnamon roll dough! My no knead pizza dough is really best in this recipe, but store bought pizza dough will work just fine also!
- Use floss to slice the cinnamon rolls. It might seem crazy but it totally works! You’ll get even, perfectly sliced rolls every time.
- Always let the cinnamon rolls rise in the pan before baking. After slicing the rolls and placing them in your pan, make sure you let them rise for 30 minutes. This step is very crucial. It will make your cinnamon rolls big and puffy and ensure that they are cooked on the outside but tender on the inside.
- Double the frosting recipe if your family loves lots of that ooey gooey cream cheese frosting!
Try these breakfast favorites next!


Did you love this recipe?
Please leave a 5-star rating and review below!
Want to save this recipe?
Enter your email below & we’ll send it straight to your inbox. Plus you’ll get great new recipes from us every week!
Easy Cinnamon Rolls with Cream Cheese Frosting
Refrigerated pizza dough makes these cinnamon rolls easy to prepare in just 15 minutes! Let the sweet smell of homemade cinnamon rolls fill your kitchen this weekend!
- Prep Time: 45 minutes (30 minutes of this is the dough rising)
- Cook Time: 30 minutes
- Total Time: 1 hour 15 minutes
- Yield: 9 large cinnamon rolls 1x
- Category: Brunch
- Method: Oven
- Cuisine: American
- Diet: Vegetarian
Ingredients
For the cinnamon rolls:
- 1/2 a recipe of my favorite no knead pizza dough (or 1 lb. refrigerated store bought dough)
- 6 tablespoons softened butter
- 3/4 cup brown sugar
- 2 tablespoons cinnamon
- pinch of Kosher salt
For the frosting:
- 4 oz. cream cheese, softened
- 2 tablespoon butter, softened
- 1 cup powdered sugar
- 1/2 teaspoon vanilla
- 1–2 tablespoons heavy cream
- pinch of Kosher salt
Instructions
- Transfer pizza dough to a lightly floured work surface and use a rolling pin to roll the dough into a large rectangle about 12″x18″.
- Spread butter across the dough in an even layer all the way out to the edges.
- In a small bowl combine brown sugar, cinnamon and salt. Sprinkle mixture across the butter in an even layer.
- Roll dough tightly forming a log, starting to roll from the long side. Then gently pat the ends so that its the same thickness throughout.
- Use a sharp knife to score the log into thirds. Then score each of those sections into thirds, giving you a guide to slice the dough into 9 cinnamon rolls.
- Use a length of floss to cut each roll by shimmying the floss under the log, lining the floss up with the score lines, then pulling the floss in opposite directions.
- Transfer cinnamon rolls to a lightly greased 8×8 baking dish.
- Cover with a clean kitchen towel and allow to rise for 30 minutes.
- Preheat oven to 350 degrees. Bake cinnamon rolls uncovered for 30-35 minutes. Ovens vary, so be sure to check the cinnamon rolls after 20 minutes or so and go from there.
- While the rolls are baking, use a mixer to whip cream cheese and butter together in a large bowl. Add powdered sugar and whip until combined.
- Add vanilla and a tablespoon of cream along with a pinch of salt.
- Whip until the frosting is thick and creamy. Add more cream as needed to loosen up the frosting.
- Spread the frosting over the fresh-from-the-oven cinnamon rolls in an even layer and enjoy!
Notes
Pizza dough makes the perfect cinnamon roll dough! My no knead pizza dough is really best in this recipe, but store bought pizza dough will work just fine also!
Use floss to slice the cinnamon rolls. It might seem crazy but it totally works! You’ll get even, perfectly sliced rolls every time.
Always let the cinnamon rolls rise in the pan before baking. After slicing the rolls and placing them in your pan, make sure you let them rise for 30 minutes. This step is very crucial. It will make your cinnamon rolls big and puffy and ensure that they are cooked on the outside but tender on the inside.
Double the frosting recipe if your family loves lots of that ooey gooey cream cheese frosting!
Nutrition
- Serving Size: 1 cinnamon roll
- Calories: 484
- Sugar: 27.3 g
- Sodium: 435.6 mg
- Fat: 18.9 g
- Carbohydrates: 72.5 g
- Fiber: 3.1 g
- Protein: 7.2 g
- Cholesterol: 41.8 mg
This post was originally published in November of 2018. It was updated in March of 2019 to include process shots and tips for making the perfect cinnamon rolls every single time!
OMG so good! I will make these often. Best recipe for cinnamon rolls ever. Thank you so much for this recipe. I used Publix brand pizza dough that you can find in the bakery. Was so easy to make. You can’t eat just one because they are just to good.
WONDERFUL!!! We make this every Christmas! We double it and put it into a 9×13. Thank you so much for this tradition!
What a perfect Christmas tradition!
Thank you! These are delicious!
So glad you enjoyed these cinnamon rolls, Isabel!
I just made these and they are amazing I made my own pizza dough earlier and used the leftover for these buns yummy
What a perfect way to use up leftover pizza dough, Terilin! I’m so glad that you enjoyed this cinnamon roll recipe 🙂
I just made these, my wife said these may have been the best cinnamon rolls she has ever had. This recipe will find it’s way into our pizza night rotation.
These were so good! I used a pizza cutter to create strips and then rolled them. Worked perfectly. The icing is delicious! We will definitely be making these often!
Once they’re baked do they need to be stored in the fridge or on the counter?
I’d probably refrigerate them if you’re going to keep them for more than 24 hours. Otherwise, you can keep them covered on the counter top.
Recipe was super easy and fun to make with my younger brother and tasted delicious!!
You can also use a piece of thread instead of dental floss. It’s strong enough.
Great idea, Sue!
Could I refrigerate the leftover frosting and use it in a week?
I think you definitely could! It will solidify as it sits in the fridge, but once it comes back to room temp it will be spreadable again!
I’m curious to know why you can’t beat together the softened butter, sugar, cinnamon & salt and shmear the whole thing on the dough, then roll. Why do all the recipes smear then sprinkle?
Beating everything together would just dirty more dishes and add another step to the process. If you’d like to beat them all together though, you’re more than welcome to! I don’t think it will change the flavor/texture much.
Can you make the cinnamon rolls the night before, refrigerate them, and then just pop them in the oven in the morning? If so, do the instructions you’ve provided need to be at all altered to accommodate this change?
They don’t seem to rise quite as well after being refrigerated so I prefer to make them, let them rise and then bake them off right away!
Can I use these with a sticky bun recipe?
Great question – I haven’t tried it but I bet it could work!
My pizza dough did not rise what can I do
Hey Paula! This article helps explain why pizza dough doesn’t rise: https://thepizzaheaven.com/why-my-pizza-dough-is-not-rising/. Not sure if you used storebought dough or homemade, but that article should help you figure out why your dough didn’t rise!
Can these be made in advance and frozen before baking?
I am not sure as I haven’t tested it. But based on a quick Google search I think they’d work best if baked and then frozen. Then you can thaw them overnight in the fridge and re-warm them in an oven around 300-350 degrees.
So easy! Used pizza dough from the grocery store. Haven’t baked in years but this recipe made me do it! Delicious! Especially loved the cream cheese frosting!!!
WOOHOO! I love using store-bought dough for this recipe. I might have to make a batch this weekend… I’m so glad you enjoyed this recipe – thanks for leaving a review! 🙂
Super super easy to make. I love this recipe. It’s DELICIOUS!!!!. The frosting I had to adjust because my heavy cream went sour. So instead, I used Vanilla Bean coffee creamer. My whole family loves it. Thank you so much for sharing.
Yum!!! I made this recipe Christmas morning. I actually made the dough 2 days before to let it rise, then I assembled everything Christmas Eve and put it in the fridge per the instructions. I let the rolls sit out for an hour before putting them in the oven. They did not rise very well though. Next time I will definitely not assemble them and put them in the fridge. I probably should have let them sit out much longer. Either way, they tasted amazing and were pretty easy. The floss idea is ingenious! Thanks for another great recipe. You never disappoint!
I’ve tested the recipe now with a few different kinds of homemade and store bought dough and I don’t recommend refrigerating the assembled cinnamon rolls before baking. They texture is the best when they are baked off right after making them.
Well, I used Pillsbury canned pizza dough crust. And I rolled it out to the measurements 12 by 18. Pretty thin. I set them aside for 30 minutes and they did not rise, nor did they rise any better when cooking. Maybe I should not have used canned pizza dough?
I don’t think the Pillsbury canned pizza dough is a pound. I think it’s a bit less (around 13 oz. or something like that) so that makes sense why it seemed thin. I typically use one of my homemade pizza dough recipes (just search “pizza dough” on the site to find one) or buy a pound of dough from a local bakery or pizza shop or the grocery store. I’m not sure if canned dough will work quite the same as a ball of pizza dough. Hope that helps!
The same thing happened with me and I followed the recipe word for word. So disappointed that I wasted all my time and the ingredients and then they just were crap
Did you also use Pillsbury canned pizza dough? If so, I think we’ve found the problem!