The Best Chicken Rice Casserole Recipe – NO CONDENSED SOUP

This cozy one-pan chicken and rice casserole comes together with about 15 minutes of prep, and then the oven takes over from there. Before you know it, you’ve got a cheesy, comforting dinner on the table in under an hour. And the best part? It’s made with real ingredients, AKA no condensed soup in sight!

This easy recipe is a weeknight hero.
There’s a time and place for condensed soup (hello, skillet chicken with mushroom sauce!), but I often like to see if I can recreate my childhood favorites without it. And this one just doesn’t need it! The starch from the rice combines with heavy cream and shredded Parmesan in this recipe, giving this casserole just the right amount of rich creaminess without reaching for the Campbell’s.
Here’s how it all comes together.
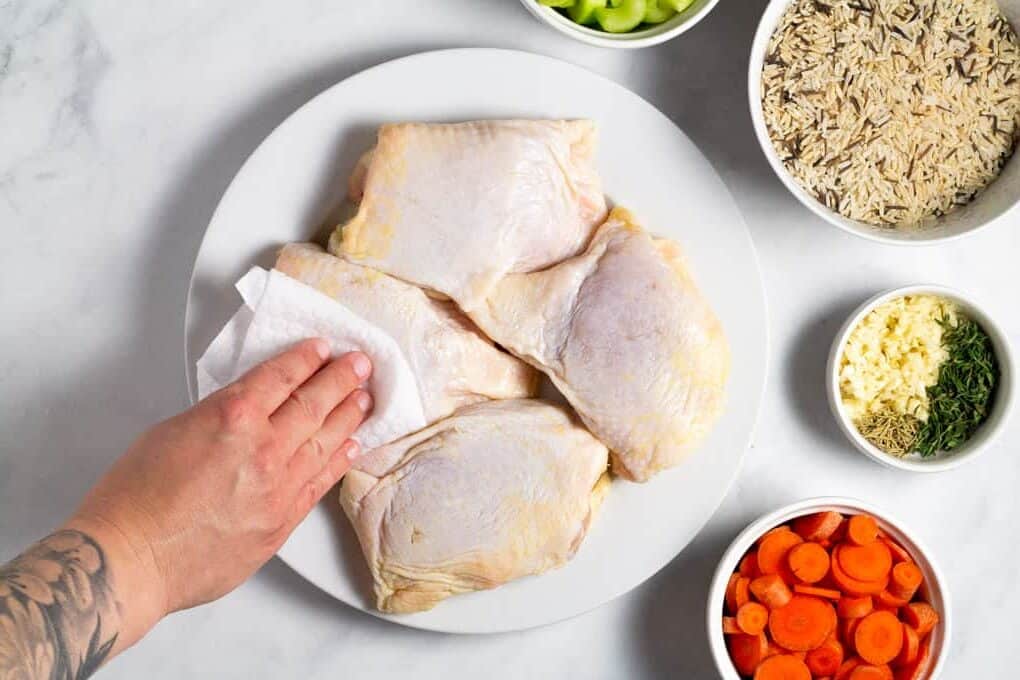
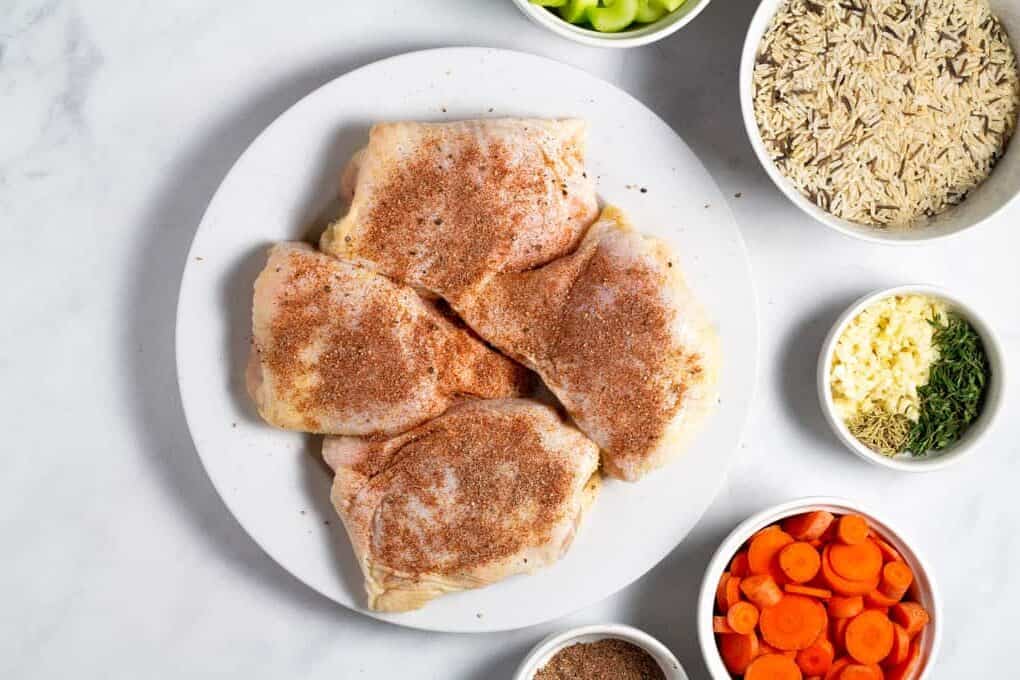
Combine paprika, garlic powder, and a large pinch of salt and pepper. Pat chicken skin dry.
Sprinkle about 2/3 of the seasoning on the skin side of the chicken.
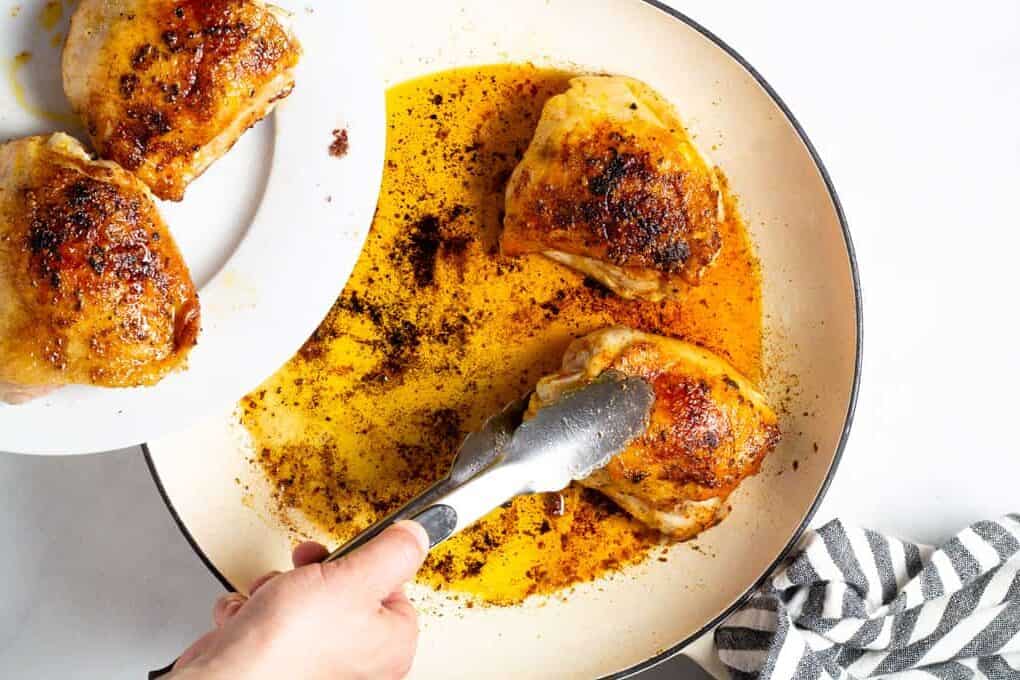
Sear chicken in oil, skin side down, for about 3 minutes or until a dark gold brown crust forms. Season the other side, flip, and cook for a couple more minutes. Remove from the pan.
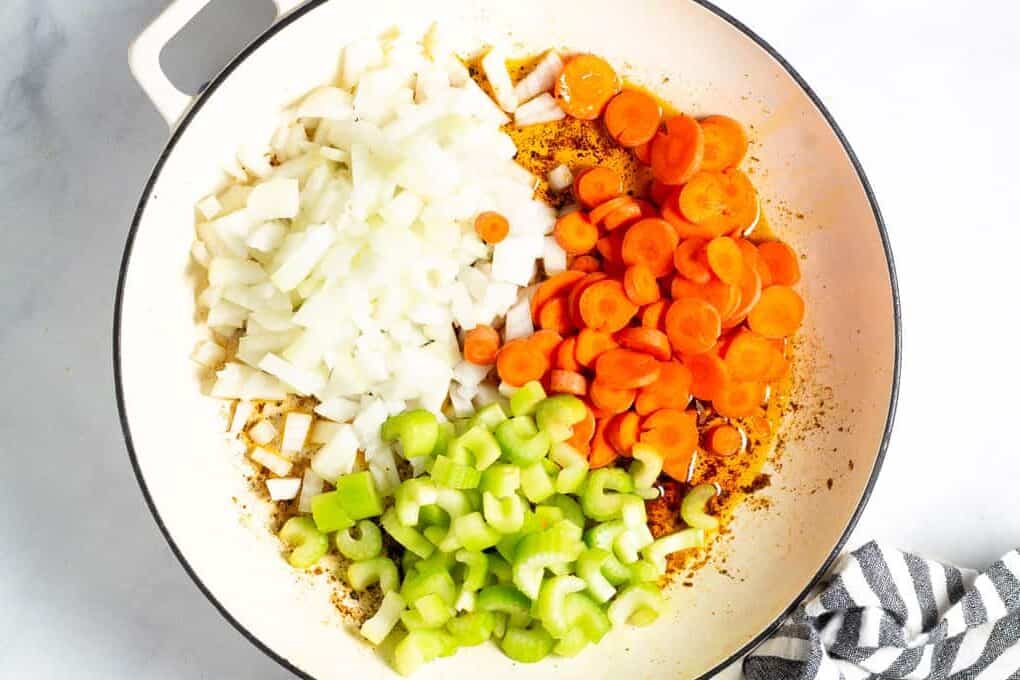
Add onion, carrot, celery, and a couple large pinches of salt and pepper to the pan. Cook, stirring frequently for about 8 minutes.
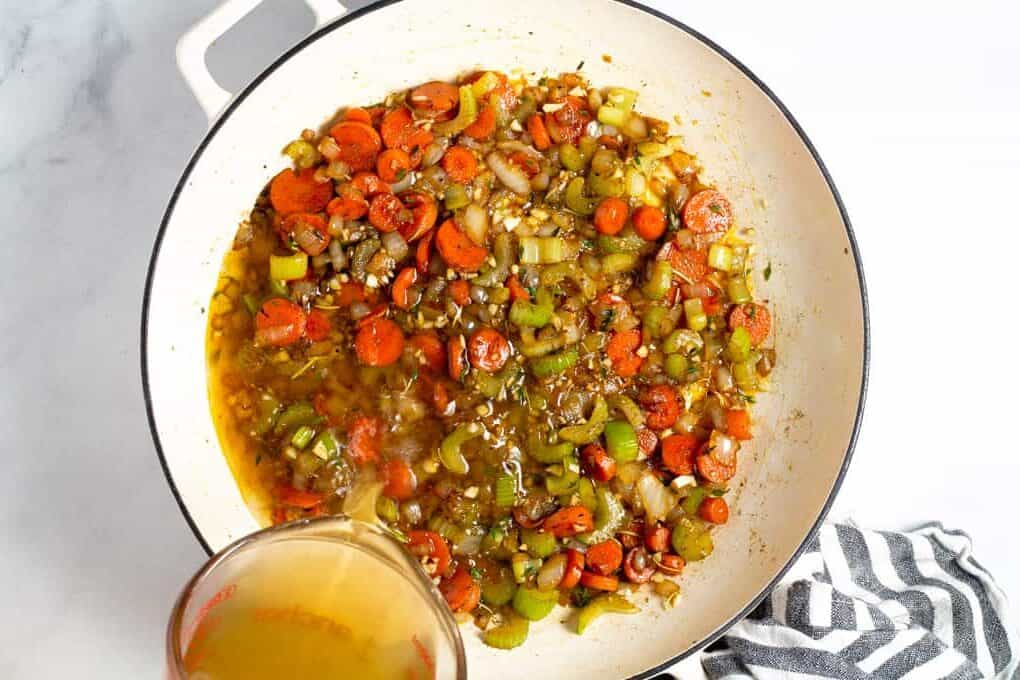
Reduce heat to medium and add garlic, thyme, and rosemary, and cook for 1 minute, stirring frequently.

Add chicken broth.
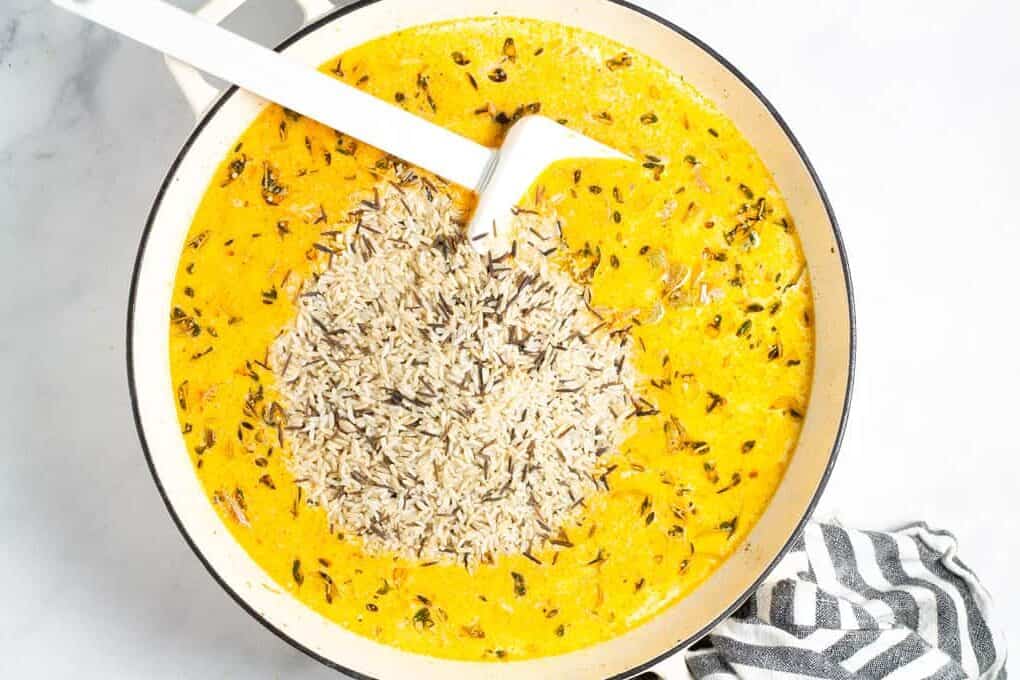
Add heavy cream, Parmesan cheese, and rice, and stir to combine.
Next, nestle chicken thighs into the rice mixture.
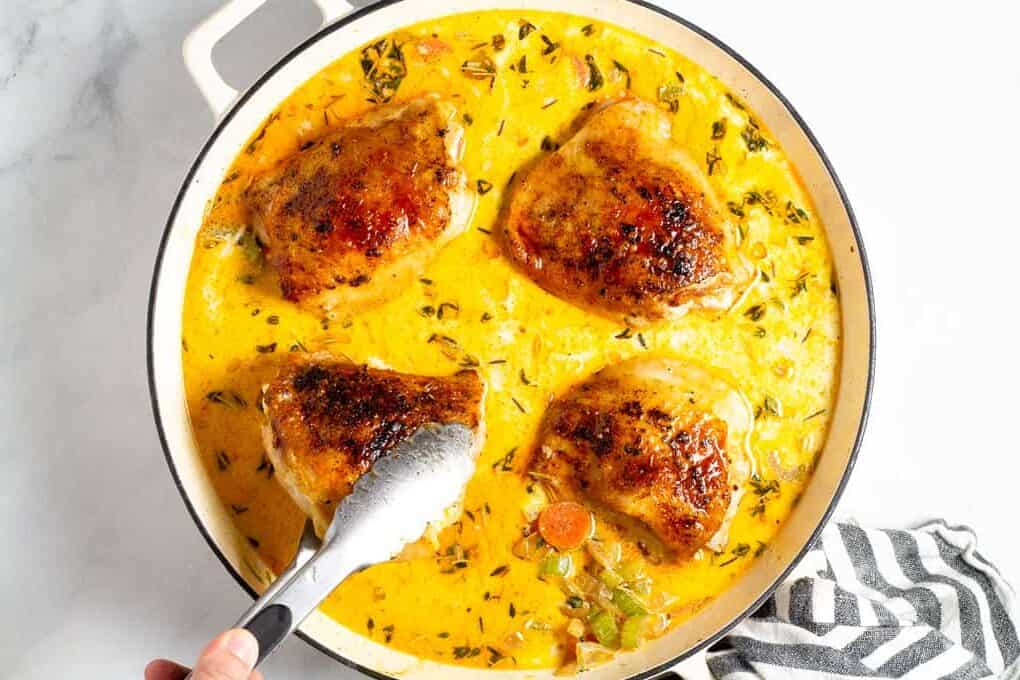
Cover and bake for 40-50 minutes or until the rice is cooked and the chicken is cooked through. Broil on high for 1-2 minutes to get the chicken skins nice and crispy again.
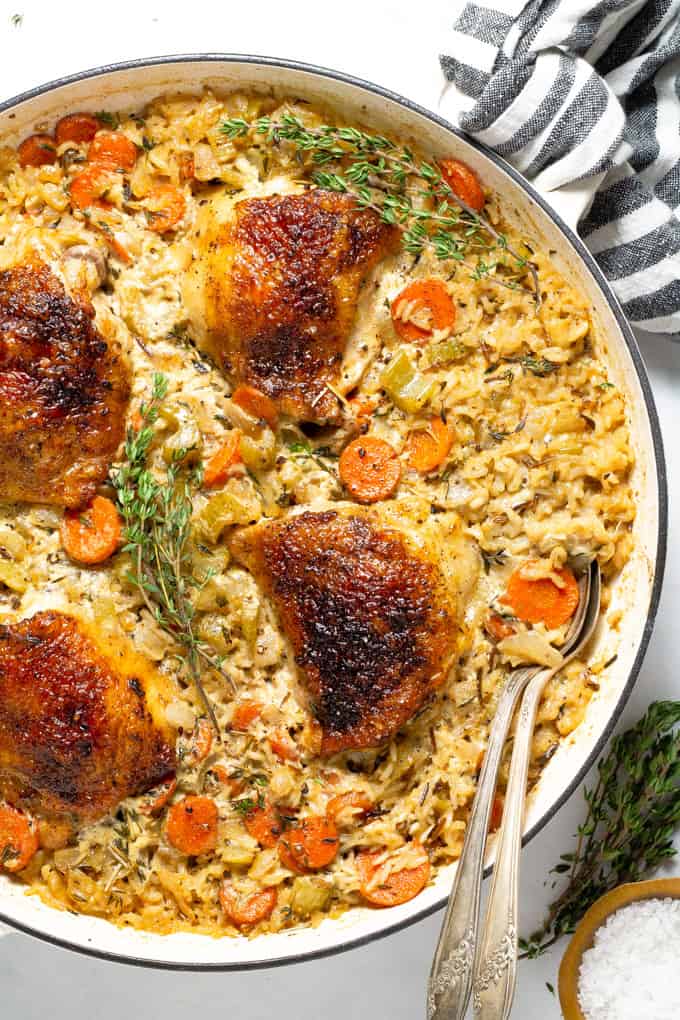
Garnish with a few sprigs of fresh thyme and enjoy!
Things I learned while testing this recipe.
- For the most flavor, use bone in skin on chicken thighs. However, if you only have skinless chicken breast on hand, I recommend following the recipe directions in the same way, but baking the rice mixture (covered) in the oven for about 20 minutes and THEN adding the seared chicken breasts to the rice, covering it again and baking for another 20-30 minutes.
- It’s tempting, I know, but please resist the urge to peek while this casserole is baking. The moisture from the broth and cream is going to cook the chicken through and make your rice nice and delicate in texture. You can safely bake it for at least 40 minutes before giving the rice a quick taste to see if it’s done. If it’s not quite cooked through, then cover it and check it again in 5 minutes or so.
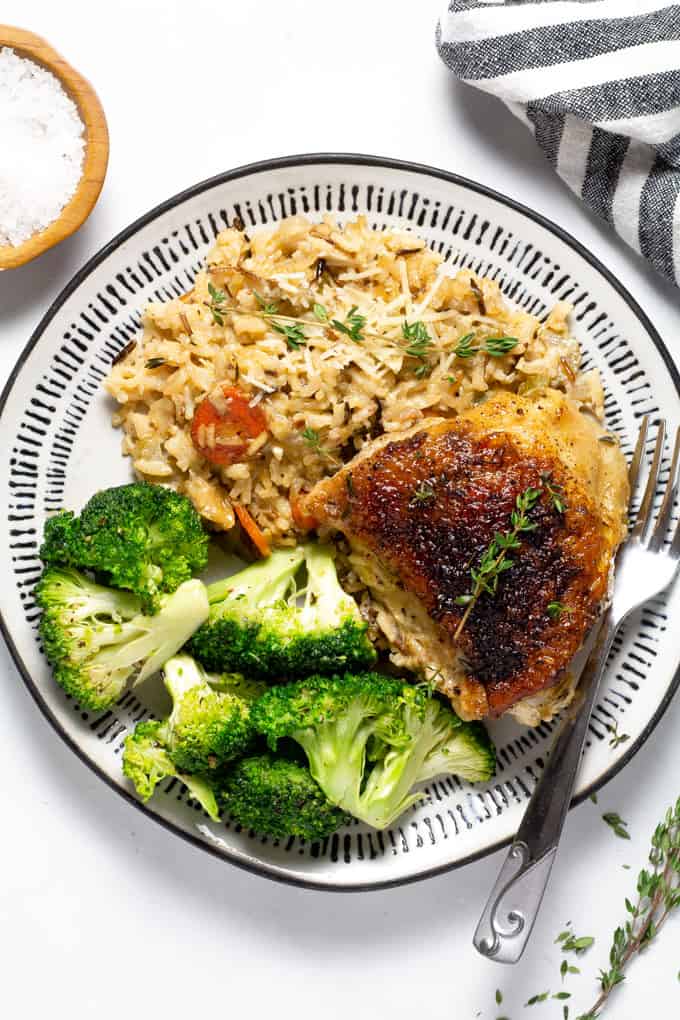
Here’s what I’d serve with this.
- super simple house salad
- kale Caesar pasta salad
- air fryer green beans
- crispy garlic bread
- air fryer asparagus
Just in case you have leftovers.
- Storage: Let the casserole cool to room temperature, then transfer leftovers to an airtight container. Store in the refrigerator for up to 4 days. If you want to keep it longer, you can freeze individual portions in freezer-safe containers for up to 2 months.
- Reheat: The easiest way to reheat is in the microwave. Add a splash of chicken broth, milk, or water to keep the rice from drying out, cover loosely, and heat in 30–60 second intervals until warmed through. You can also reheat it in the oven. Place the casserole in an oven-safe dish, add a splash of broth or milk, cover with foil, and warm at 350 degrees for about 15–20 minutes, or until heated through.
More easy casserole recipes for your eating pleasure.


Did you love this recipe?
Please leave a 5-star rating and review below!
Want to save this recipe?
Enter your email below & we’ll send it straight to your inbox. Plus you’ll get great new recipes from us every week!
Easy Chicken Rice Casserole

One pan and just 15 minutes of prep time means you can have this cheesy chicken and rice casserole dinner on the table in less than an hour. And the best part is it’s made with real ingredients, ie: NO condensed soup necessary!!
- Prep Time: 15 minutes
- Cook Time: 45 minutes
- Total Time: 1 hour
- Yield: 6–8 servings 1x
- Category: Main Dish
- Method: Stove Top + Oven
- Cuisine: American
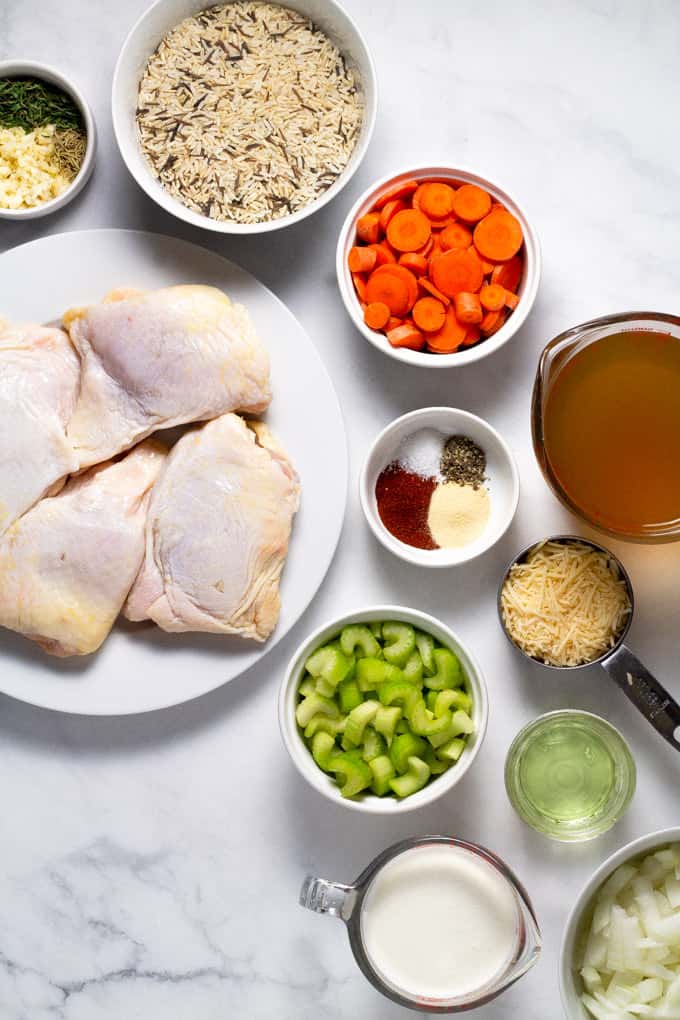
Ingredients
- 2 tablespoons olive oil
- 2 lbs. bone in, skin on chicken thighs
- 1/2 teaspoon paprika
- 1/2 teaspoon garlic powder
- 1 yellow onion, diced
- 1 cup sliced carrots
- 1 cup sliced celery
- 5 cloves garlic, minced
- 2 teaspoons fresh thyme
- 1/2 teaspoon dried rosemary
- 1.5 cups basmati & wild rice blend (I used Della brand)
- 3 cups chicken broth
- 8 oz. heavy cream
- 1/2 cup shredded Parmesan
- Kosher salt
- fresh cracked pepper
Instructions
- Preheat oven to 350 degrees. Heat olive oil in a large oven safe saute pan over medium high heat.
- Combine paprika, garlic powder and a large pinch of salt and pepper. Sprinkle about 2/3 of the seasoning on the skin side of the chicken.
- Sear chicken in oil, skin side down, for about 3 minutes or until a dark gold brown crust forms. Add remaining seasoning to the underside of the chicken (which is now facing up).
- Flip chicken over and sear the other side for about 2 minutes. Remove from pan and set aside. At this point the chicken will just be seared on the outside, not cooked through. It will finish cooking with the rice in the oven.
- With heat still at medium high add onion, carrot, celery and a couple large pinches of salt and pepper to the pan. Cook, stirring frequently for about 8 minutes.
- Reduce heat to medium. Add garlic, thyme and rosemary and cook for 1 minute, stirring frequently.
- Then add broth, heavy cream, Parmesan cheese and rice. Stir to combine.
- Next nestle chicken thighs into rice mixture. Cover and bake for 40-50 minutes or until the rice is cooked and the chicken is cooked through.
- Broil on high for 1-2 minutes to get the chicken skins nice and crispy again.
- Garnish with fresh parsley and enjoy!
Notes
- For the most flavor, use bone in skin on chicken thighs. However if you only have skinless chicken breast on hand, I recommend following the recipe directions in the same way, but baking the rice mixture (covered) in the oven for about 20 minutes and THEN adding the seared chicken breasts to the rice, covering it again and baking for another 20-30 minutes.
- If you don’t have fresh thyme, feel free to sub dried! I would recommend about a 1/2 teaspoon of dried thyme in place of the fresh in this recipe. If you’re a big thyme LOVER then go for a full teaspoon of dried thyme. I usually opt for fresh thyme in this dish, but dried will work just as well!
- It’s tempting, I know, but resist the urge to peek while this casserole is baking. The moisture from the broth and cream is going to cook the chicken through and make your rice nice and delicate in texture. You can safely bake it for at least 40 minutes before giving the rice a quick taste to see if it’s done. If it’s not quite cooked through, then cover it and check it again in 5 minutes or so.
Nutrition
- Serving Size: 1/8 of chicken and casserole
- Calories: 506
- Sugar: 2.8 g
- Sodium: 403.5 mg
- Fat: 33.2 g
- Carbohydrates: 27.6 g
- Fiber: 2.8 g
- Protein: 24.8 g
- Cholesterol: 131.8 mg
This was so good! Used boneless skinless chicken thighs. Only alteration to the recipe was I deglazed the pan with white wine, about 1/4 cup of Pinot Grigio. Will definitely make this again. So much better than the condensed soup recipe!
Great idea, Shelley! I will have to try adding a bit of wine next time I make it 🙂 Thanks for leaving a review!
Can I use minute rice instead
This recipe won’t work as well with mintue rice 🙁 It will cook too quickly in this dish and end up mushy and overcooked unfortunately. Great question, Lorraine!
i am obsessed with this recipe. it’s so good i could eat this every week😂i’ve made it 3 times since i’ve discovered it
Yay! I am so glad to hear that, Olivia! 🙂 Thanks for leaving a review!
Made this tonight with chicken breasts (my crew prefers chicken without the bone or skin). It was excellent. Everyone loved it and the whole house smelled amazing while it was in the oven. I loved the texture of the rice and using whole ingredients and not having to use any congealed cream soup with lots of sodium and preservatives 🙂 I also loved the flavor profile with the addition of the parmesan cheese. After I made it I thought of another ingredient that could take it up another notch (and that I will try next time): sauteed mushrooms! Can’t wait to give that a try. Thanks for the excellent recipe! It’s a keeper!
Could not agree more – there is a time and a place for condensed soup but not in this recipe! Mmmmmm mushrooms are SUCH a good idea!! Thanks so much for leaving a review, Angie!
Thank you for a casserole recipe without cream of anything canned soup. If I’m using leftover cooked rotisserie chicken pieces, at what point closer to the end would I add the chicken?
I would probably add it around step #8 (instead of adding chicken thighs back in, add the rotisserie chicken). You will miss out on a lot of flavor using rotisserie chicken instead of searing chicken thighs though. I think your best bet might be to Google a rotisserie chicken and rice casserole recipe.
Can I substitute coconut milk for cream? This looks delicious!
Yes! I think full-fat canned cooconut milk would work great!
Do you have a recommendation for how to start this the night before and then cook the next day? Or is it the type that’s better day 2? Thanks!
Good question! I haven’t tried starting it the night before but I’ll see if anyone else has and might be able to chime in with how it went for them!
Final analysis:
FABULOUS! I might have overdone the salt this time, but that’s an easy fix. My husband went from “what did you say we were having?” to stealing bites of rice from the corner the instant the foil came off!
If you make 6 thighs, you can serve two each for dinner, and your husband can take some for lunch the next day.
Some slight differences:
* I used 4 garlic cloves, minced
* I preheated my 9×13
* Once we mixed the rice, broth, cream (half n half) and Parmesan cheese in, we transferred everything to the 9×13, and nestled the chicken, tightly covered with foil
* baked for 1 hour
* Took out and let sit for 10 minutes.
Perfect perfect PERFECT!
Love love love to hear this, Julia! Thank you so much for sharing how you did it – that is really helpful!! 🙂
Thanks, Julia. I don’t have a pot that I can cook on the stove and then put in the oven, so this was so helpful. I’m looking forward to making this for dinner with the 6 chicken thighs you recommended.